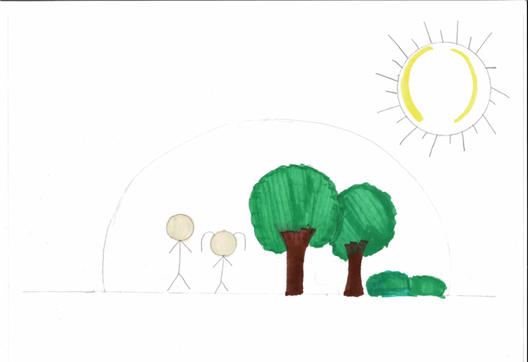
My final project once again began with a paper and colored pencils. With the other students in my batch, the entire process became fun. We chatted while working; there was one friend in particular whom I really enjoyed talking to, as she was not only fun but also very smart, which made our conversations even more interesting. We often had similar ideas, and she also chose a similar idea for our final project, which made it easier to relate to each other and made the whole process feel even more enjoyable. Since the design of my drawing was inspired by the structure of soap bubbles, I made sure it had a dome structure with smooth curves. In the sketch, I also added simple landscape elements such as trees, humans, and open space to place the building within a natural setting. This step was important because it helped me visualize what the structure would look like. It also allowed me to see what the model would look like with things inside, so it didn’t look very isolated (still looked weird, but it was the first stage, so it was fine).
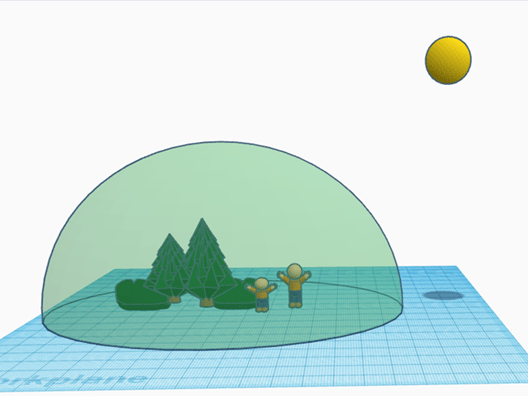
Next, I began with digital models using Tinkercad. It was fun to use this software once more, as now I was creating something of my own, by myself. Here, I created a basic dome shape to represent the overall structure of my building. This helped me visualize the designs and the elements in it in a better way. I also experimented with shapes and tools in Tinkercad and how the internal space could be used. The design was basic and just a simple idea to see how the idea would look in a 3D manner. It just had a simple dome with people and plants, but for me, it was a great model because it was my model, and I was really happy that I could create a 3D model now.
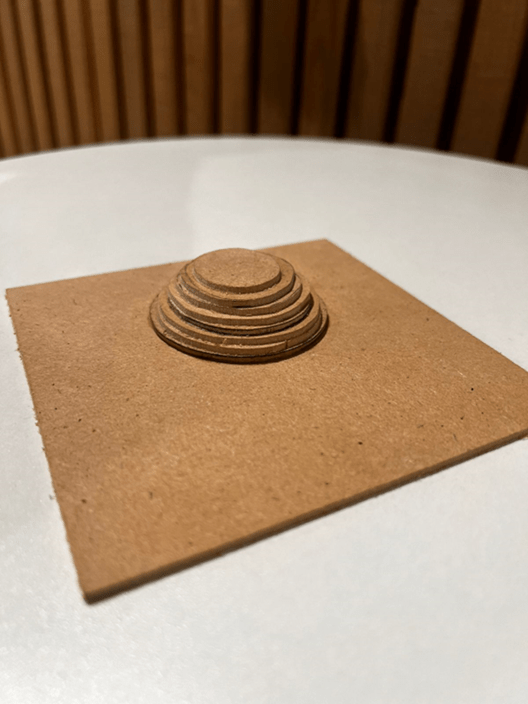
To take the idea further, I created another version of the model with stacked circular layers using a machine called a scroll saw. This design helped me break down the dome into smaller sections, making it easier to understand how the structure could actually be constructed in real life. In this step, I drew out different-sized circles on many thin pieces of wood and cut them with the scroll saw, then layered them on top of each other so it looks like a dome-shaped structure. Using the scroll saw was, and is still, very difficult for me. Despite this, it was really fun to learn a new machine, of which I hadn’t even heard the name before. I was also given many safety instructions, and at that point, I wondered why a kid like me was even allowed to use it if it was so dangerous (it wasn’t, by the way).
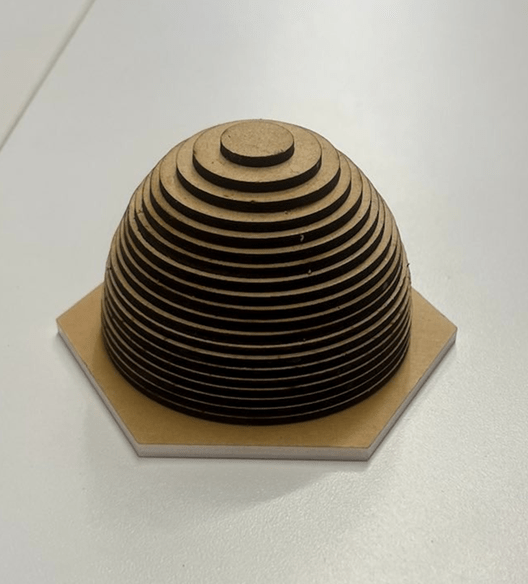
After working on that, I created a better and neater version of it, which was a laser-cut model, where the dome was created using multiple thin layers stacked on top of each other. This model was especially useful because it showed the structure in a precise manner. This was done using a CAD software called Rhino, which is a professional version of Tinkercad. We created different-shaped circles and placed them on a rectangle, which we then cut using a laser cutting machine. This entire process was so fun to watch for me. We were also taught how to use the machine and how to export the files, but I remember not paying attention because I just could not focus on anything but the machine!
Later, I also made a concrete model of the same design. This helped me understand the weight, texture, and stability of the structure. Unlike the laser-cut model, which was more about accuracy, the concrete model made the design feel more realistic and closer to an actual building material. We did this by using a form box, which is a vacuum forming machine, and used a plastic sheet and the laser cut model to get the plastic sheet the same way as the laser cut model. Then we filled it with concrete and let it cure to make a concrete model of the design. This process was unlike the other things I did at RCDI. Basically, we used a plastic sheet which we heated and then pushed down on our laser-cut model (which I was so sure would break due to a whole machine being pushed on it), but it didn’t, and the plastic created a mould of my laser-cut design, which back then felt like something out of this world.

Another important stage for the final creation of the model was creating a Rhino model, where I explored more complex surface patterns and variations of the dome. Here, I also explored more designs that could be added to make the design more appealing while also using less material in print. This was a very time-consuming process as I had no idea how to do that and took way too much help from the teachers, but it was really fun experimenting with different tools in Rhino and trying out different designs. I basically used different commands and tried out different patterns to see which looked good, and then thickened the lines so it became a 3D design. I was also really excited to see how the 3D print of this would turn out as the thickness of the lines was only 2-3 mm, which can break very easily.
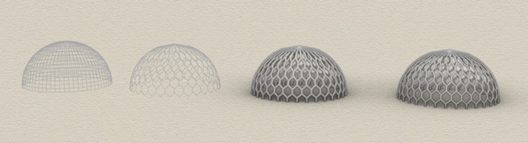
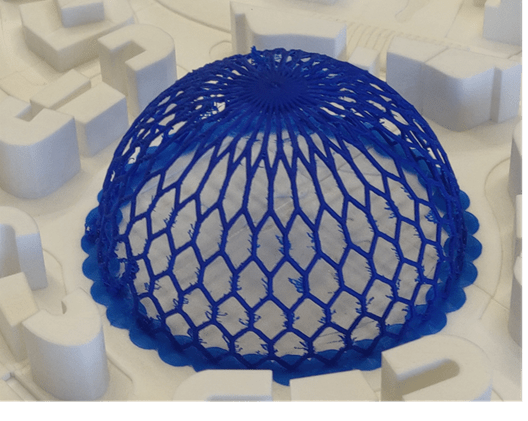
Finally, I created a 3D printed model of the isometric dome using Ultimaker Cura and the model that was designed in Rhino, which included a more detailed outer structure and a patterned surface. This was probably the most satisfying part, as it brought together everything I had been working on, from concept to details, into one final model.
The process was far from easy. Because the model was so thin, it needed a huge amount of temporary support filament. Ironically, we ended up using more support material than the actual model material! And because of this huge amount of filament, the first print was a disaster. The machine overheated over the 60 hours that it took to print. This felt disappointing because a lot of filament, electricity, and time were wasted. And on top of that, it also felt a little ridiculously funny. And to make things worse, my class met only once a week, so not having any progress in the next class felt even more frustrating. Fortunately, though, we were able to print it again. Changing the support settings fixed the issue, and it finally printed perfectly! I felt relieved beyond measure when I saw the final result in front of my eyes.
My final model created a controlled microenvironment over a garden. It was designed for sustainable food production; it could regulate growth conditions, maximising crop yield while using minimal land and material. This hence became a scalable and sustainable solution to combat food scarcity and help achieve zero hunger.
While all of this was happening, we were also doing a challenging side quest. We were asked to choose a celebrity and design a floor plan for them. I chose Roseanne Park as my client, as I really enjoyed listening to her music. We first studied her lifestyle and interests and noted them down to understand what kind of spaces she would need in her home. Based on this, I designed a floor plan that included rooms suited to her needs, and used digital software to bring the layout to life. Working on this simultaneously with others made the process even more fun and engaging, and it also helped me understand how design can actually be used to meet people’s real-life needs, preferences, and lifestyles. This was so fun, and at that time, it felt like creating something for the actual celebrity that I did it so seriously, like my idea was actually gonna be used to create her house!
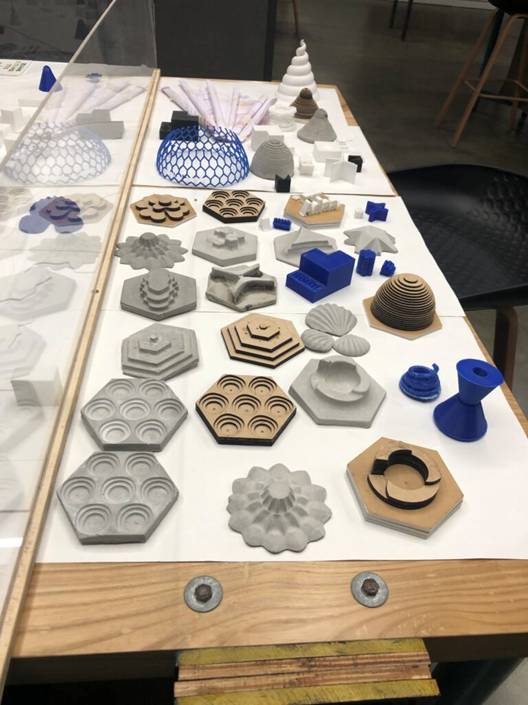
In my opinion, each model played a different role in the process. Some of them helped with understanding the basic shape of my design, others focused on construction and materials, and some were for a more creative exploration. Together, they helped me fully develop my design.
Looking back, I was really happy with how the project turned out, and it was really different from my expectations. For me, this course started off as something I would have never attended. To me, discovering my interest in design and that designing makes me happy! It also taught me that something as simple as nature can help humans solve real-world problems uniquely and creatively. This also made me realise that I would love to continue going to RCDI and trying out new courses that align with my interests. Did I end up going back for another course? Stay tuned to find out.

Leave a comment